Having your DStv decoder connected to the internet can greatly enhance your viewing experience.
It allows you to access on-demand content, software updates, and various online features offered by DStv.
If you are wondering how to connect your DStv decoder to the internet, you are in the right place.
In this comprehensive guide, we will walk you through the steps to seamlessly link your decoder to the World Wide Web.
Connecting your DStv decoder to the internet is a straightforward process that can open up a world of possibilities in terms of entertainment and convenience.
Whether you want to access Catch Up, Showmax, or simply keep your decoder’s software up to date, a reliable internet connection is the key.
How to Connect DStv Decoder to the Internet
1. Check Compatibility
Before diving into the connection process, ensure that your DStv decoder model supports internet connectivity.
Not all DStv decoders offer this feature, so consult your decoder’s manual or check the DStv website for compatibility information.
2. Gather Required Materials
You will need the following materials to proceed
- DStv Explorer Decoder
- TV
- Active Internet Connection
- Router (for Wi-Fi connection)
- Ethernet Cable (for wired connection)
3. Connecting via Wi-Fi
- Turn on Your Decoder and TV: Start by powering on your DStv decoder and your TV. Make sure they are both functioning properly.
- Access Network Settings: Using your TV remote, navigate to Settings >> Select System Settings >> Select Connectivity Set-up.
- Select Wi-Fi Connection: From the menu, select “Network” or “Internet Setup,” depending on your decoder model. Then, choose “Wi-Fi.”
- Enter Wi-Fi Credentials: You will be prompted to select your Wi-Fi network from the list. Once selected, enter the Wi-Fi network password when prompted.
- Confirm Connection: Wait for your DStv decoder to establish a connection with the Wi-Fi network. Once connected, you’ll be ready to access online features.
4. Connecting via Ethernet
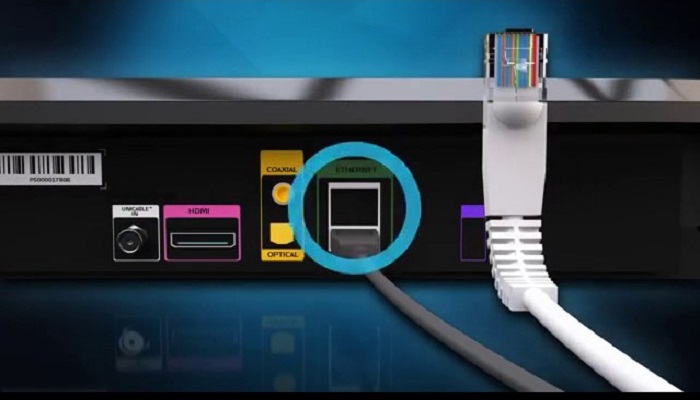
- Plug in the Ethernet Cable: Connect one end of the Ethernet cable to the Ethernet port on the back of your DStv decoder. Connect the other end to an available LAN port on your router.
- Configure Network Settings: Your decoder may require some network settings to be configured. Follow the on-screen instructions to set up an IP address, subnet mask, gateway, and DNS server if needed.
- Test the Connection: After the physical connection is established, test the internet connection on your DStv decoder to ensure it’s working correctly.
5. Software Updates
If prompted, it’s advisable to update your DStv decoder’s software. Software updates often include improvements and bug fixes, ensuring a smoother experience.
6. Accessing Online Features
With your DStv decoder now connected to the internet, you can enjoy various online features like Catch Up, Showmax, and BoxOffice, depending on your subscription package and regional availability.
7. Troubleshooting Tips
If you encounter any issues, here are some troubleshooting tips:
a. Connection Issues
- Ensure your Wi-Fi network is functioning correctly.
- Check if your decoder and router are within the Wi-Fi signal range.
- Confirm the correct Wi-Fi password.
b. Slow Internet
- Contact your internet service provider if you experience slow internet speeds.
- Consider upgrading your internet plan for faster speeds.
c. Decoder Updates
- Regularly check for decoder software updates in the settings menu.
Conclusion
Connecting your DStv decoder to the internet is a simple yet valuable step to enhance your viewing experience.
With access to online features and software updates, you can enjoy seamless entertainment on your own terms.
RELATED ARTICLES


